How to create a custom Azure Blueprint
Microsoft provides a great variety of built-in Azure Blueprints. However there are cases in which you need to create a custom Azure Blueprint. This article provides instructions on how to create a custom Azure Blueprint.
Solution
Section titled “Solution”Below you can find a detailed list of built-in Azure blueprints and artifacts commonly available:
-
Subscription Management Blueprints:
-
Azure Governance: Deploys a set of management and security policies to enforce governance and compliance requirements across subscriptions.
-
Azure Cost Management and Billing: Sets up cost tracking and budget controls for better financial management.
-
-
Identity and Access Management (IAM) Blueprints:
-
Azure Active Directory (AAD) Roles: Assigns predefined Azure AD roles to users, groups, or applications to manage access control.
-
Conditional Access Policies: Enforces access control policies based on various conditions like device compliance, location, or user group.
-
-
Network and Security Blueprints:
-
Azure Virtual Network (VNet): Deploys a predefined VNet configuration with subnets, NSGs, and route tables for network isolation and security.
-
Azure Firewall: Sets up a managed firewall service to control outbound and inbound traffic to Azure resources.
-
Virtual Private Network (VPN): Establishes a secure connection between on-premises networks and Azure using VPN gateways.
-
-
Infrastructure Blueprints:
-
Azure Virtual Machines (VMs): Deploys VM instances with predefined configurations, such as size, OS, and storage options.
-
Azure Kubernetes Service (AKS): Creates a managed Kubernetes cluster with automatic scaling and monitoring capabilities.
-
Azure Web App: Sets up a scalable and managed web application hosting environment.
-
Azure Functions: Creates serverless functions to run code in response to events or triggers.
-
-
Data and Analytics Blueprints:
-
Azure Storage: Deploys Azure storage accounts with predefined configurations for blob, file, table, or queue storage.
-
Azure SQL Database: Sets up a managed SQL database service with options for performance tiers, replication, and backups.
-
Azure Data Factory: Creates data integration pipelines for orchestrating data movement and transformation.
-
Azure Databricks: Deploys an Apache Spark-based analytics platform for big data processing.
-
-
DevOps Blueprints:
-
Azure DevOps Project: Sets up a complete DevOps pipeline with source control, build and release automation, and application insights.
-
Azure Container Registry (ACR): Deploys a private container registry for storing and managing container images.
-
Azure Functions CI/CD: Automates the deployment of Azure Functions using continuous integration and continuous deployment pipelines.
-
-
Management and Monitoring Blueprints:
-
Azure Monitor: Configures monitoring and alerting for Azure resources and applications.
-
Log Analytics: Deploys a workspace and connects data sources for log collection, analysis, and visualization.
-
Azure Policy: Enforces policy compliance by applying rules and controls to Azure resources.
-
These are just a few examples of built-in Azure blueprints and artifacts available. Azure continually adds new blueprints and artifacts to meet evolving customer needs.
To create a custom Azure Blueprint, follow the steps below.
Step group 1: Prepare Your Blueprint
-
Define your requirements and configurations: Determine the set of Azure resources and their desired configurations that you want to include in your blueprint.
-
Identify dependencies: Take note of any dependencies between resources and ensure that they are correctly specified in your blueprint.
-
Plan your blueprint structure: Decide how you want to organize your blueprint, including its artifacts, parameters, and policy definitions.
Step group 2: Create the Blueprint Definition
-
Sign in to the Azure portal (https://portal.azure.com).
-
Navigate to the Azure Blueprints service: Use the search bar at the top or browse through the Azure services to find “Azure Blueprints.”
-
Click on “Blueprint Definitions” in the left-hand menu.
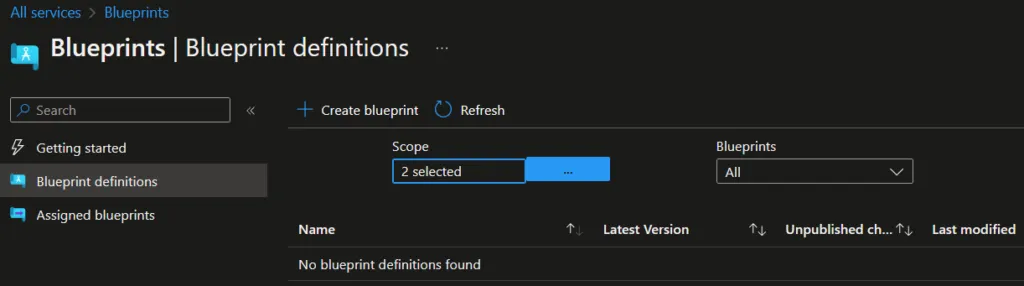
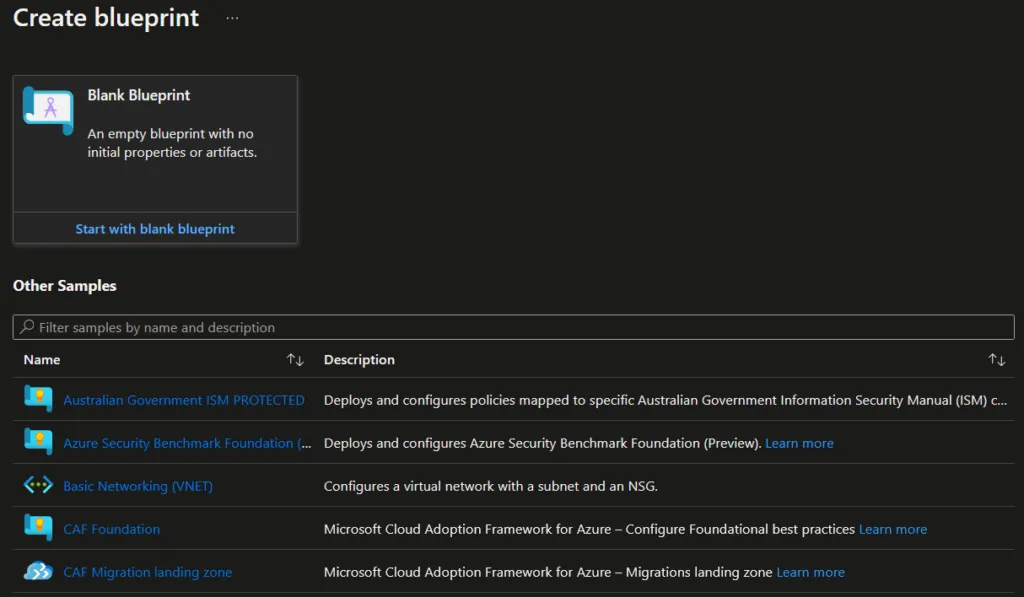
- Click on the “Create blueprint” button to create a new blueprint definition. You can start with a blank blueprint or pick one of our pre-defined samples to help you get started quickly.
-
To create a custom Blueprint, choose “Start with blank blueprint”.
-
Provide a name and description for your blueprint definition.
-
Choose a versioning strategy for your blueprint.
-
Click “Next” to proceed to the next step.
Step group 3: Define Artifacts
-
In the “Artifacts” section, click on “+ Add Artifact.”
-
Select the type of artifact you want to add (e.g., Policy Assignment, Resource Group, Virtual Machine).
-
Configure the artifact by providing the required details, such as resource names, properties, and dependencies.
-
Repeat steps 1-3 to add all the necessary artifacts to your blueprint.
Step group 4: Define Parameters (optional)
-
In the “Parameters” section, click on “+ Add Parameter.”
-
Provide a name, display name, description, and data type for each parameter.
-
Specify any additional settings, such as default values, allowed values, and constraints.
-
Repeat steps 1-3 to add all the necessary parameters to your blueprint.
Step group 5: Define Policy Assignments (optional)
-
In the “Policy Assignments” section, click on “+ Add Policy Assignment.”
-
Select the policy definition you want to include in your blueprint.
-
Configure the policy assignment by providing the required details, such as assignment name, display name, and parameters.
-
Repeat steps 1-3 to add all the necessary policy assignments to your blueprint.
Step group 6: Review and Publish the Blueprint Definition
-
Review all the details of your blueprint definition to ensure everything is correctly configured.
-
Click on the “Review + create” button.
-
Review the validation results for any errors or warnings and make the necessary adjustments.
-
Once the validation is successful, click on the “Create” button to create the blueprint definition.
-
After the blueprint definition is created, click on the “Publish blueprint” button.
-
Provide a version number and any release notes for the blueprint.
-
Click on the “Publish” button to make the blueprint available for assignment.
Step group 7: Assign the Blueprint to a Subscription
-
Navigate to the “Blueprint Assignments” section in the Azure Blueprints service.
-
Click on the “+ Assign blueprint” button.
-
Select the subscription where you want to assign the blueprint.
-
Choose the version of the blueprint you want to assign.
-
Configure any assignment-specific settings, such as parameter values or artifact overrides.
-
Review the summary and click on the “Assign” button to assign the blueprint to the subscription.
-
Monitor the assignment progress and verify that all the resources and configurations defined in the blueprint are successfully provisioned.
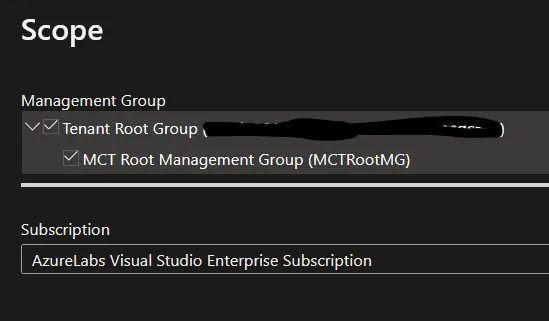
At this point, you should have successfully created a custom Azure Blueprint and assigned it to a subscription. Your custom blueprint will enforce the desired configurations and deploy the specified resources whenever it is assigned to a subscription. The scope for an Azure Blueprint can be either a management group or a subscription.